Getting hands-on with Amazon SageMaker notebook instances – Amazon SageMaker Modeling – MLS-C01 Study Guide
Getting hands-on with Amazon SageMaker notebook instances
The very first step, in this section, is to create a Jupyter Notebook, and this requires a notebook instance. You can start by creating a notebook instance, as follows:
Sign in to your AWS account.
Navigate to Services > Amazon SageMaker.
In the left navigation pane, click on Notebook instances and then click on the Create notebook instance button.
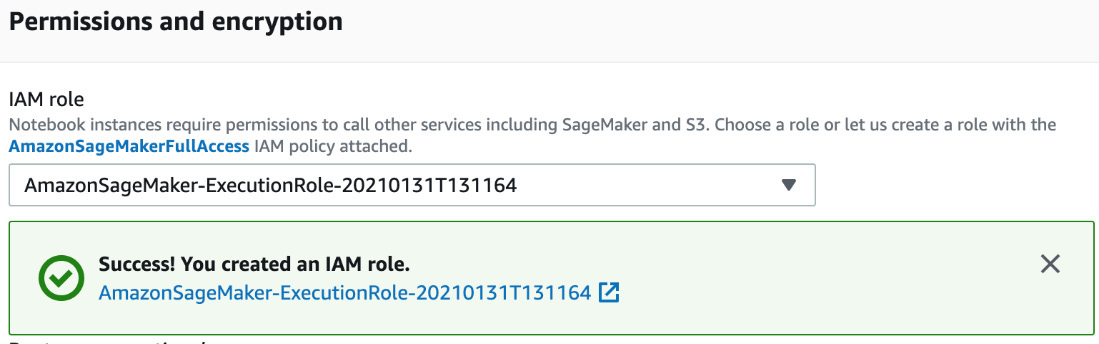
Provide a Notebook instance name value such as notebookinstance and leave the Notebook instance type at its default ml.t2.medium setting. In the Permissions and encryption section, select Create a new role in IAM role. You will be asked to specify the bucket name. For the purpose of this example, it’s chosen as any bucket.
Following the successful creation of a role, you should see something similar to Figure 9.3:
Figure 9.3 – Amazon SageMaker role creation
Leave everything else on their default settings and click on the Create notebook instance button.
Once the instance is in the InService state, select the instance. Click on the Actions drop-down menu and choose Open Jupyter. This opens your Jupyter Notebook.
Now, you are all set to run our Jupyter Notebook on the newly created instance. You will perform Exploratory Data Analysis (EDA) and plot different types of graphs to visualize the data. Once you are familiar with the Jupyter Notebook, you will build some models to predict house prices in Boston. You will apply the algorithms that you have learned in previous chapters and compare them to find the best model that offers the best prediction according to our data. Let’s dive in.
In the Jupyter Notebook, click on New and select Terminal. Run the following commands in Command Prompt to download the code to the instance:
Once the Git repository is cloned to the SageMaker notebook instance, type exit into Command Prompt to quit. Now, your code is ready to execute.
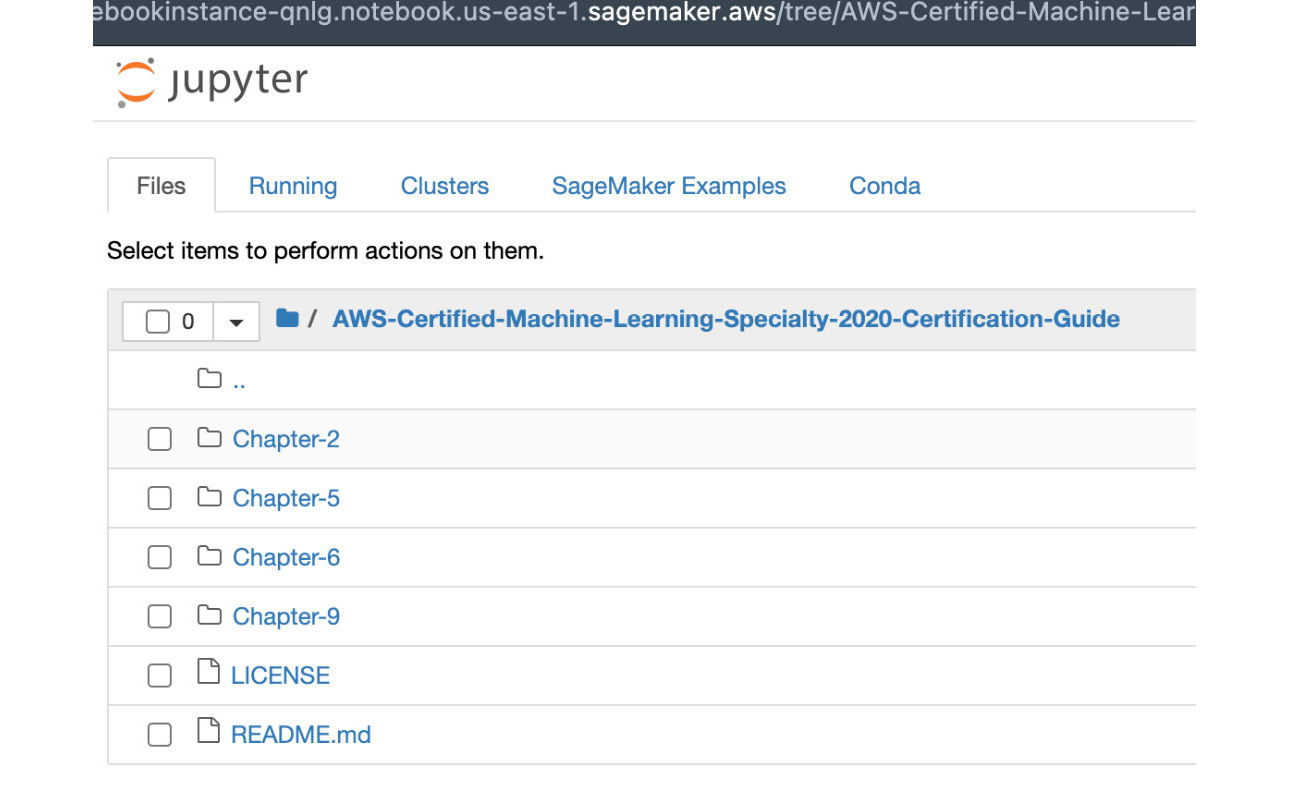
Navigate to Chapter-9 in the Jupyter Notebook’s Files section, as shown in Figure 9.4:
Figure 9.4 – Jupyter Notebook
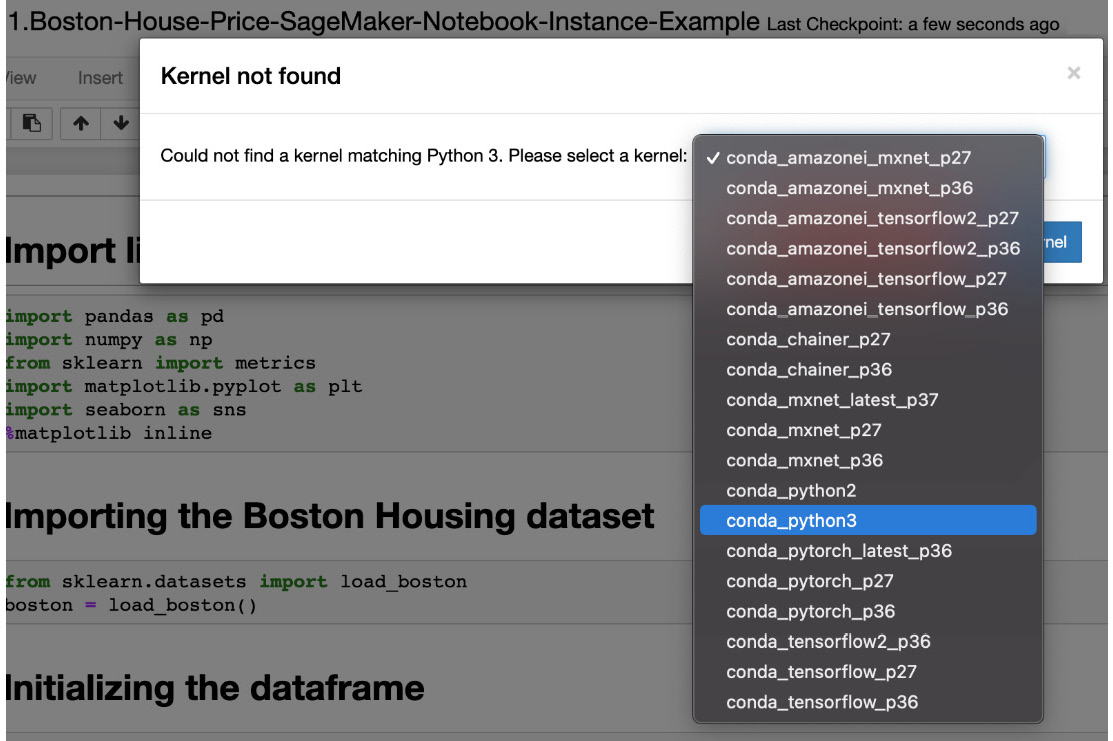
Click on the first notebook in 1.Boston-House-Price-SageMaker-Notebook-Instance-Example.ipynb. It will prompt you to choose the kernel for the notebook. Please select conda_python3, as shown in Figure 9.5:
Figure 9.5 – Jupyter Notebook kernel selection
From the notebook, navigate to Kernel > Restart & Clear Output. Click on the play icon to run the cells one after another. Please ensure you have run each individual cell and inspect the output from each execution/run.
You can experiment by adding cells and deleting cells to familiarize yourself with the Jupyter Notebook operations. In one of the paragraphs, there is a bash command that allows you to install the xgboost libraries from the notebook.
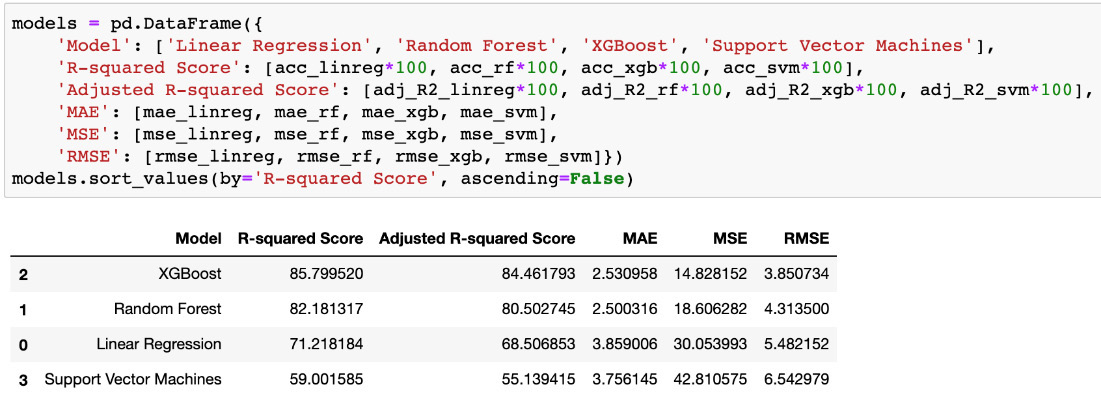
The final cell explains how you have compared the different scores of various modeling techniques to draw a conclusion mathematically. Figure 9.6 clearly shows that the best model for predicting house prices in Boston is XGBoost:
Figure 9.6 – Comparing the models
Once you’ve completed the execution of this notebook, please feel free to shut down the kernel and stop your notebook instance from the SageMaker console. This is a best practice to reduce costs.
In the next hands-on section, you will familiarize ourselves with Amazon SageMaker’s training and inference instances. You will also use the Amazon SageMaker API to make this process easier. You will use the same notebook instance as you did in the previous example.