Configuring a Custom Event Bus – CloudWatch and CloudWatch Metrics – SCS-C02 Study Guide
Configuring a Custom Event Bus
When you want to receive events, you will need an event bus. This is the pipeline in the AWS system of resources that receives the events. The event bus comprises rules that are examined as the different events come into the event bus. You can have multiple event buses, and each rule is associated with a specific event bus.
There are some basic facts to know about EventBridge event buses:
The default event bus in each of your AWS accounts is the one that receives events from the AWS services.
You can create a custom event bus that receives events from another account than the one where the event bus is located.
You would use a partner event bus to send or receive events from a SaaS partner.
Each event bus can be configured for up to 300 rules. If you need more than 300 rules for a single event bus, you will need to create another custom event bus.
The next section will take you through creating a rule in the default event bus that would receive an event from one of the services from our AWS account.
Adding a Rule to the Event Bus
A simple exercise of adding a rule to the default event bus can help you gain a better understanding of how rules and events all work together in the EventBridge service. Follow these steps to enter a rule in your event bus:
Go to the EventBridge service at http://console.aws.amazon.com/events/.
On the left-hand navigation pane, choose Rules under the Buses main heading.
Figure 8.20: EventBridge menu screen
Now, on the Rules page, click on the orange button labeled Create rule.
After clicking the Create rule button, you should be on the Define rule detail page. For Name, enter EC2-termination. You can leave the rest of the default settings as they are since this rule will be triggered with an event pattern and not by a schedule. After entering the rule name, scroll to the bottom of the page and click on the orange Next button.
Clicking the Next button will bring you to the Build event pattern page. In Event source, you should be able to leave this selected as AWS events or EventBridge partner events.
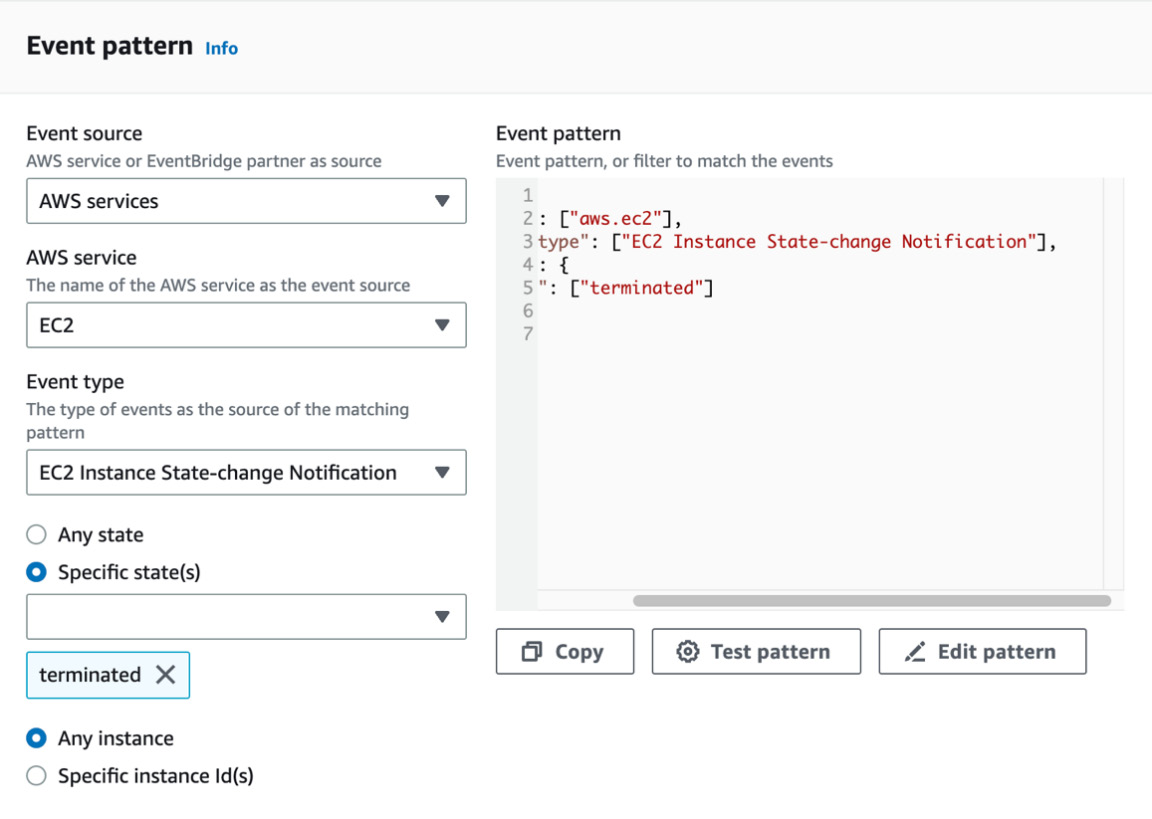
Move down the page until you see the heading of Event pattern. On the left side, where the drop-down menus are, choose EC2 from the AWS service dropdown. Under Event type, select EC2 Instance State-change Notification, then choose terminated for Specific state(s). After you have done this, press the orange Next button at the bottom of the screen.
Figure 8.21: Event pattern screen for EventBridge
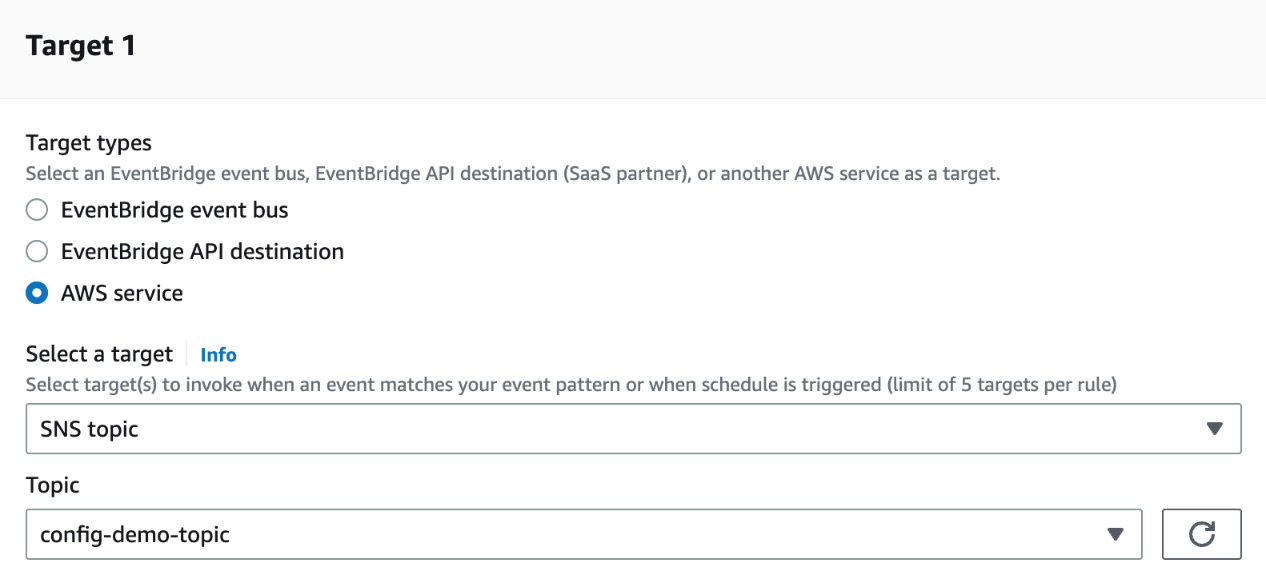
Now it’s time to select your targets. Hopefully, you have an SNS topic from one of the earlier exercises in Chapter 5 or 6. Choose AWS service under Target type. Under Select a topic, click the drop-down menu and find SNS topic. Use the drop-down menu to select the topic name. After choosing these configuration settings, press the orange Next button at the bottom of the page.
Figure 8.22: Target selection screen for EventBridge
This should take you to the Tags page. Press the orange Next button to move on.
Finally, on the Review and create page, look over the settings you have entered and ensure everything seems correct. If it is, scroll to the bottom of the page and click the Create rule button.
To test your rule, you can terminate the instance you created as part of the CloudWatch agent exercise. Once the instance has reached a termination state, you should receive a notification via email if you are subscribed to the SNS topic.
You can also automate tasks using EventBridge by running them on a schedule. The next section discusses this.